How to Floss if You Have Braces
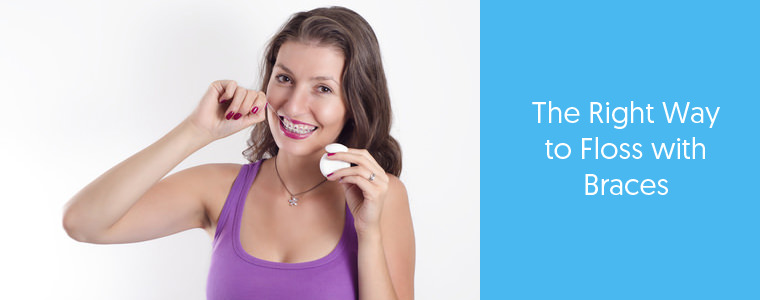
So, how does one floss with braces?
The answer is simple: you don’t use floss solely.
There are other products designed to be more accessible, and specifically for people with braces.
Braces are a significant investment that can lead to that perfect, confident smile.
However, the journey to that smile can often be somewhat cumbersome.

For most parents, it is quite difficult to convince their children to floss their teeth properly.
This task gets even worse when their children get braces.
Bacteria and food debris have more spaces to accumulate with braces, and without proper cleaning, it could lead to plaque buildup.
In this article, we will discuss these options in detail and how each of them has its own benefits for people with braces.
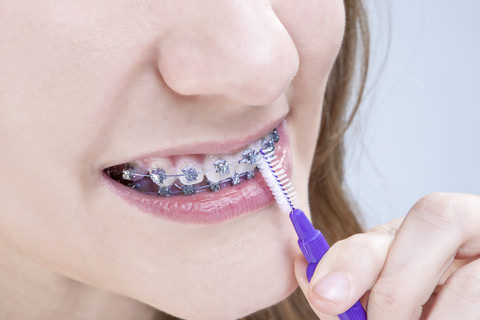
Interdental Brushes
Also known as inter-proximal or simply interdental brushes, most dentists recommend using these as an alternative to floss.
While dental floss is a thread that could get stuck in your metal braces, interdental brushes are small and come in different shapes and sizes.
The most common shape of interdental brushes is that of an L-shaped pick, while some have a plastic handle with a small cylindrical brush tip.
The tips of interdental brushes are very thin, with bristles on top that come in varying strengths: soft, medium, and hard.
The tips also vary in thickness to fit snugly between the teeth.
We recently reviewed and tested an interdental brush by Piksters.
The company also makes bamboo Piksters for the more environmentally minded flosser.
To Use Interdental Brushes:
- Hold the brush firmly with the index finger and thumb. You can support your index finger with your middle finger for better guidance.
- Insert the brush between your teeth below the wire of the braces with smooth and gentle motions. Do not force the brush inside.
- Move the brush forward and backward carefully. Take care that the brush doesn’t rub too hard on your gums.
- Repeat the process for all the teeth.
You can use these brushes to clean the debris off your braces as well, but avoid putting pressure on your braces while doing so.
Interdental brushes need to fit perfectly between the teeth.
Otherwise, they could cause more harm than good.
If loose, they can turn and prick the user’s gums, damaging them.
This could also cause infections if the brush isn’t washed properly.
If too tight, they might hurt when going in and increase the gaps between teeth.
The bristles can also damage the gums as they rub across them.
Interdental brushes come in a wide range of sizes for different parts of your teeth, i.e., between molars, canines, and even incisors!
Interdental brushes feature many advantages such as:
- Ease of access.
- No residue.
- Reusability.
- Choice of colour.
However, there are several disadvantages associated with them as well.
- The bristled tip of the brush has a metal wire going through it, which can damage the user’s gums.
- Despite washing it regularly, much like toothbrushes, these brushes can accumulate bacteria unless sterilised after every use.
- Different size requirements for different teeth.
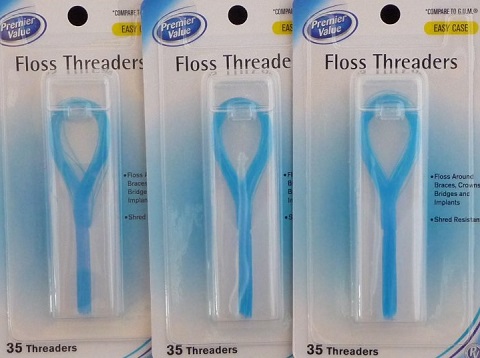
Dental Floss Threader
A dental floss threader is specially designed to help people with braces floss their teeth.
It is a disposable tool that can be used to thread a regular dental floss around, under, and between the braces, which is otherwise impossible.
Dental floss threaders are quite similar to large needles in shape, except they are made of either silk, nylon, or Teflon, much like dental floss.
To Use a Dental Floss Threader:
- Pull out a 30cm piece of floss.
- Pass the floss through the loop of the threader.
- Now pass the threader from under the wire between the braces’ brackets.
- Pull the threader up while holding a part of the floss below it. You should now have the floss under the brace-wire and right on top of your tooth.
- Lightly insert the floss between your teeth with gentle, zig-zag motion as you normally would.
- Gently slide the floss between your teeth and scrape away any food debris.
- Use the same gentle zig-zag motion to pull the floss out.
- Repeat until all the teeth are flossed.
The brace between each tooth will mean that you will have to pull the floss out each time and reinsert it to continue flossing.
The insertion and reinsertion of floss each time you want to floss will take up a lot of your time.
But like anything, the more you practice, the better and easier it will become.
You’ll surely perfect this technique and find it much safer and more hygienic than other means of cleaning.
However, with this technique, you might not be able to clean your braces as efficiently as with interdental brushes.
Another downside to this method is that dental floss threaders are not reusable and must be discarded after every use.
This does significantly increase the cost of flossing.

Source: Waterpik
Oral Irrigator
An oral irrigator or water flosser is an excellent option for those with braces.
Oral irrigators are a somewhat new technology that features a stream of water through a handheld device.
Any specialty store or chemist usually have these for sale for about $115 and up.
Oral irrigators were initially commonly found at a dental clinic, but have become a lot more popular for general use at home.
They are smaller, relatively cost-effective for what they do which makes them a sort after dental tool if you have braces.
To Use an Oral Irrigator:
- First, clean the water tank. Fill the reservoir with lukewarm water and rinse it to make sure there is nothing that can block the pipes or otherwise make the water dirty.
- Refill the reservoir.
- Add a small amount of antiseptic mouthwash into the water to increase the stream’s effectiveness.
- Choose the tip you need.
- Insert the selected tip into the handheld. It should twist and lock in place.
- Hold the tip 3-5cm away from your teeth and press the stream button.
- Start with your molars and work your way down towards your incisors. Also, make sure you clean your braces while working around your teeth.
- Make sure you spray between the teeth either from the front or the back. Dentists recommend you aim for the top of the tooth, base of the gum, and space between teeth.
- Empty and clean the reservoir when done.
Oral irrigators come in different shapes, the most basic model being the countertop model.
It is designed to sit on the counter and has a large water reservoir just beside it.
Then there’s the cordless model that is much smaller in size and perfect for travelling.
However, it has less power and may be hard to handle due to the weight of the water.
Other models include features such as a sonic toothbrush, adjustable valves, and child-friendly designs for kids.
As mentioned above, there are several types of irrigator-tips. These include;
- Jet Tip – It lets out a steady flow of water, ideal for application on the gums and teeth.
- Toothbrush Tip – is exactly what the name suggests. A toothbrush. It has a steady flow of water streaming through the centre to help you brush better.
- Plaque Seeker Tip – is ideal for users with dental crowns, bridges or implants, allowing it to work around them with ease.
- The orthodontic tip – is the ideal choice for people with braces. It helps remove plaque and debris from the around the brackets and wires of the braces.
- A Pik Pocket Tip – helps remove plaque from within periodontal pockets. This is particularly helpful for people with chronic periodontitis
Flossing and Oral Irrigator: A Winning Combo!
While an oral irrigator is a promising way to help clean teeth, dentists do not recognise it as an alternative to flossing.
They recommend that you floss your teeth every once in a while.
This is because, while an oral irrigator can clean the brackets and wire of the braces, removing all food from between your teeth can be a challenge.
Some debris might get stuck too deep for the spray to be useful.
The spray can also cause more harm than good if proper care is not taken, damaging your gums more than floss would.
As crucial as flossing is for healthy teeth, it is all the more important for people with braces as it provides more area for plaque to set in.
However, you shouldn’t neglect other important factors when taking care of your braces.
Besides flossing, brushing correctly and a healthy diet are equally important!
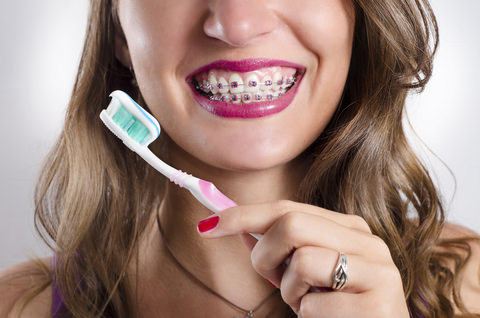
Brushing with Braces
Even if you floss regularly, if you don’t brush your teeth it will only be a matter of time before plaque and other tooth problems start setting it.
To brush with braces:
- Select a toothbrush with soft bristles so that they don’t damage the braces.
- Use a fluoride toothpaste.
- Make sure the toothbrush is wet to allow for easier brushing. Brushing with dry toothpaste and brush might cause the paste to get stuck between the wires or brackets of your braces.
- Hold the brush at an angle.
- Brush in small, circular motions to reach food debris that may be stuck around your braces and under the gum line.
- Brush your upper and lower teeth from the front and back. Also, brush your tongue and the roof of your mouth.
- Rinse.

Taking Care of Your Diet
A major part of living with braces is remembering what you can and can’t eat.
Hard foods can put undue pressure on your braces and cause the wires or brackets to bend or break, which can be painful and increase your time with braces.
Following is a list of foods you should avoid when dealing with braces:
- Popcorn.
- Nuts.
- Chewing gums or sticky lollies.
- Peanut butter.
- Hard lollies.
- Ice cream.
This list is not exclusive, but the general idea is to avoid all hard or sticky substances.
Here is a short list of things you should be careful of while eating if you can’t resist:
- Raw vegetables or hard fruits like carrots and apples.
- Corn on the cob.
- Burgers.
- Crisps.
These foods contain hard or sticky substances that can damage your braces and cause inconvenience and discomfort to you.
In order to maintain a healthy diet with braces, you should consider the following foods:
- Shakes.
- Scrambled eggs.
- Soft fruits.
- Soups.
- Cooked vegetables.
- Mashed potatoes.
- Noodles.
- Ravioli.
- Yogurt.
- Pudding.
- Steamed vegetables.
- Soft meats.
- Cookies.
- Boiled or soft-cooked rice.
- Bread.
Again, this list is not exclusive. You should consult your dentist to better understand what foods are good for you.
Conclusion
Although braces may seem like a pain, they can help create a confident smile for children and teenagers alike.
It is essential that you take proper care with your teeth during the braces-period to quickly reap their benefits.
As long as they are installed, you might think that they only serve to ruin your smile.
However, a clean pair of braces over regularly cleaned teeth send a whole different message and are beautiful on their own.
And if at any time you feel that your regular flossing and brushing techniques aren’t working, your dentist can help you clean your teeth and braces quickly and effectively!
So try the methods mentioned above to clean your teeth, get a confident smile, and let us know what worked for you in the comments below.
By Dr. V
Created at October 27, 2018, Updated at January 25, 2025