KAPOW Smiles Whitening Kit Review
KAPOW Smiles Teeth Whitening Kit aims to make whitening your teeth fun. It definitely is one of the most noticeable whitening kits on the Australian market, that’s for sure.
Update: KAPOW Smiles Teeth Whitening Kits have recently all sold out. Check out another brand of Teeth Whitening Kits created by the same supplier, called Whiter Smile. Click the button below for price details!
Kapow Smiles Teeth Whitening Kit
Our Verdict
8.3/10
Pros
- Colourful, vibrant and fun - a great way to whiten your teeth
- Information and instructions are easy to understand, application was also pretty easy
- Whitens your teeth - My experience was between 2-3 shades lighter over 8 days
Cons
- Does take at least 60 mins per day to use plus extra time for the the re-mineralisation gel
- The whitening process created a lot of salvia for me, quite messy removing the trays and LED light.
Technical Details
-
DimensionsThe box is 26.5 long x 19.4cm x 4.7cm
-
Notable MaterialsCarbamide Peroxide, Glycerol, Propylene Glycol, Purified Water, Edta, Carbomer, Povidone
-
Manufacturing CountryTBC... but Kapow Smile is Australian owned and operated.
-
Warranty Information
Jump to Contents
Full Review
Teeth whitening kits can be very similar in design, especially from a packaging point of view.
Kapow Smiles teeth whitening kit offers a fun whitening experience and when I got the kit it sure looked fun to me.
The Kapow Smiles Kit
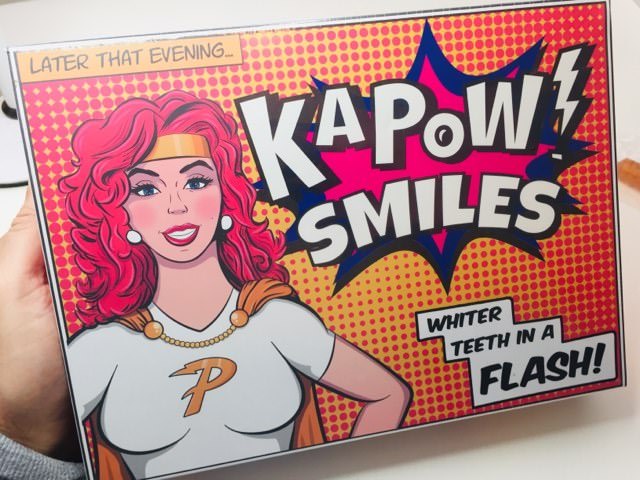
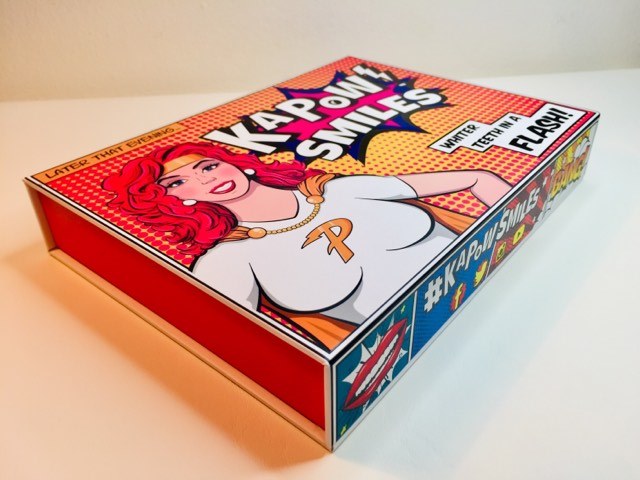
The box and the packaging design has vibrant colouring and quite out there, almost cartoon in appearance which is captivating.
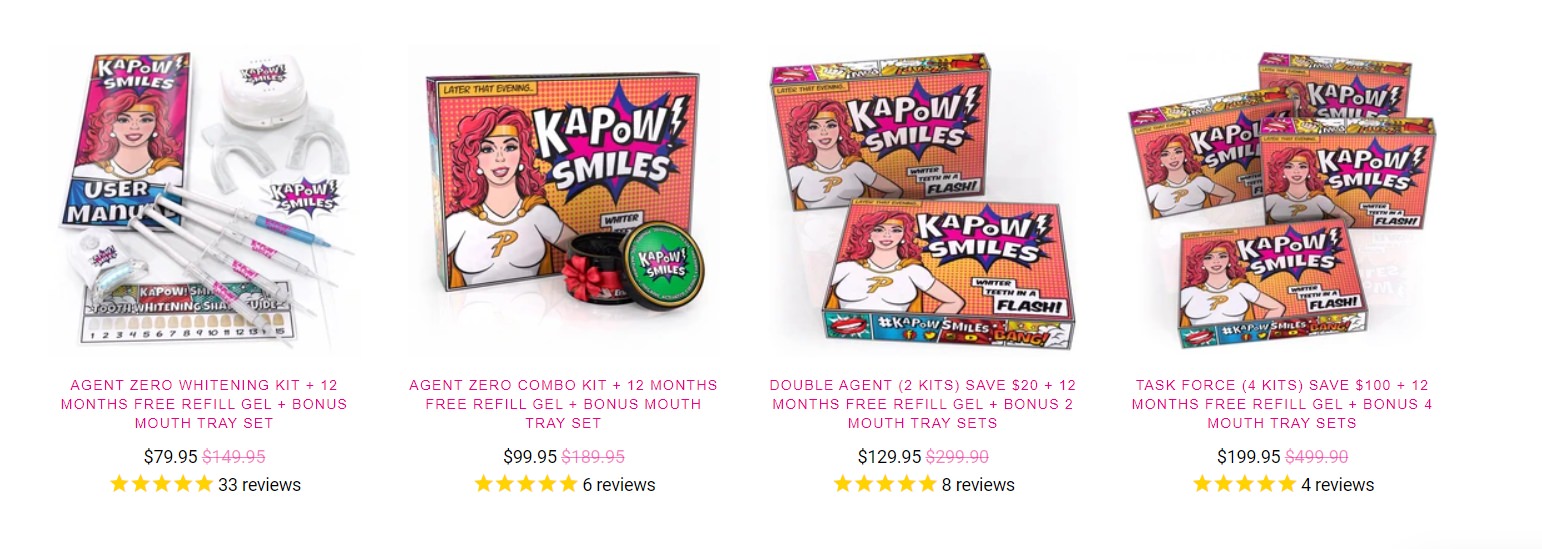
There are 4 kit purchasing options to choose from on their website plus some refill and replacement packs available as well.
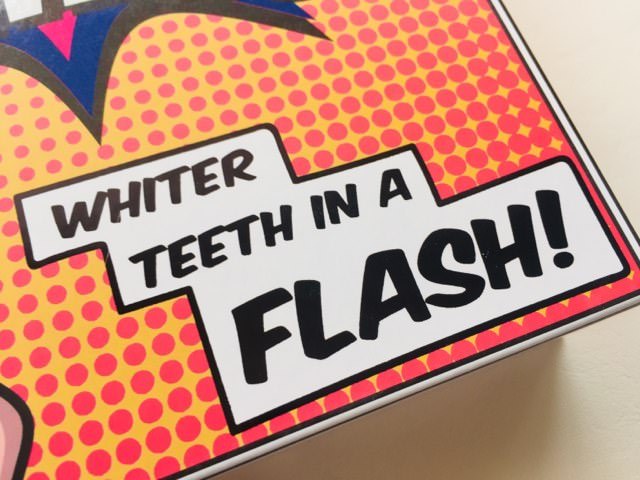
A fun tag line on the box
Compared to many other whitening kits in Australia which have a more neutral packaging style, Kapow really stands out!
First Impressions
The bold and dramatic colours used in this kit blew me away.
I could tell the brand stood for something quite different… a lighter and much more fun way for customers to whitening their teeth.
The design impressed me but it won’t appeal to all. It is very ‘in your face’ branding and you’ll either love it or dislike it straight off the bat.
The first initial whitening test was positive. I was happy with how the Kapow kit performed.
Sensitivity issues weren’t a problem while using the gel and I didn’t get after-effects either.
A lot of salvia formed in my mouth at the 30-minute mark, it was fairly substantial and it did surprise me!
Prepare to invest some time in the whitening process if you opt for this kit. Designate at least 30 minutes of whitening time plus another 30 – 1 hour to let the process work (no food or drink) for optimal results.
Let’s have an in-depth look at Kapow Smiles whitening kit, from the packaging and whitening ingredients to testing this kit for 8 days.
Packaging and What’s Inside?
My Kapow whitening kit came by way of express shipping and was delivered promptly and without issue.
The box is made out of cardboard and is recyclable. It’s a decent size but works well to house all the parts of the kit.
All the items you get inside the Kapow Kit
It is strong and sturdy so it can be knocked around a bit without causing any problems or damage to the items inside.
I like the way it’s been put together and have enjoyed setting up my whitening station in the comfort of my own home.

A look inside Kapow Smile’s Teeth Whitening Kit
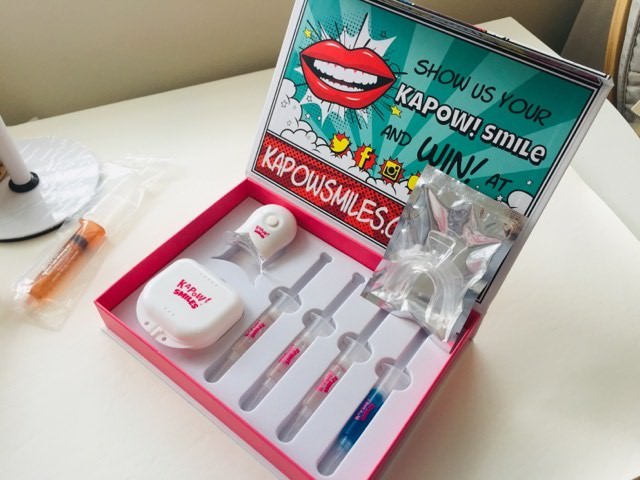
Inside my KAPOW Smiles whitening Kit, I found the following items:
- 3 whitening gel syringes (15 treatments in total)
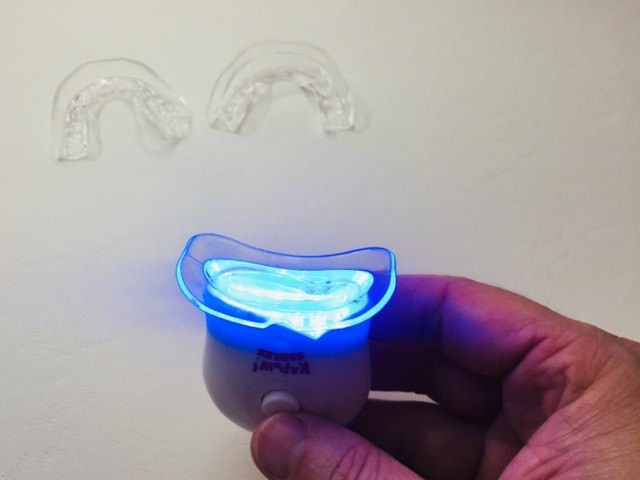
- 2 sets of mouth trays (1 a spare)
- Hygienic traycase
- 6 LED Whitening Light
- 1 x syringe of desensitizing gel
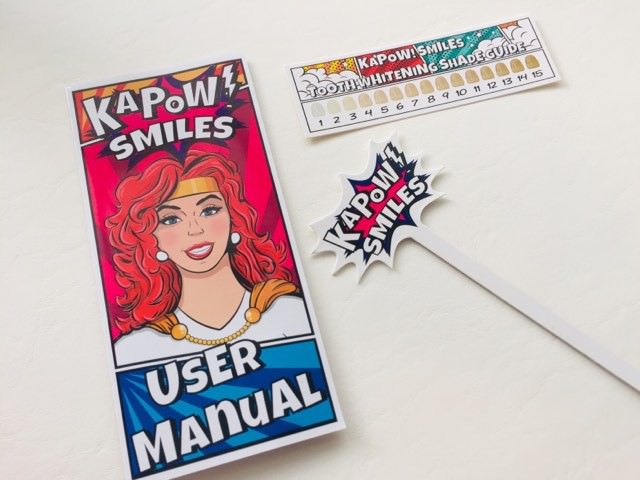
- 1 x shade guide
- A user manual
- A fun social sign
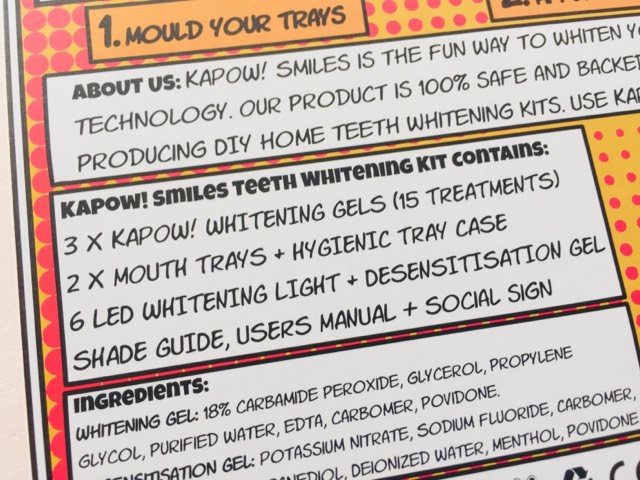
Kapow Smiles Ingredients are printed on the back of the box
I also received 1 x premium teeth whitening gel with the kit. It was individually wrapped up inside the box.
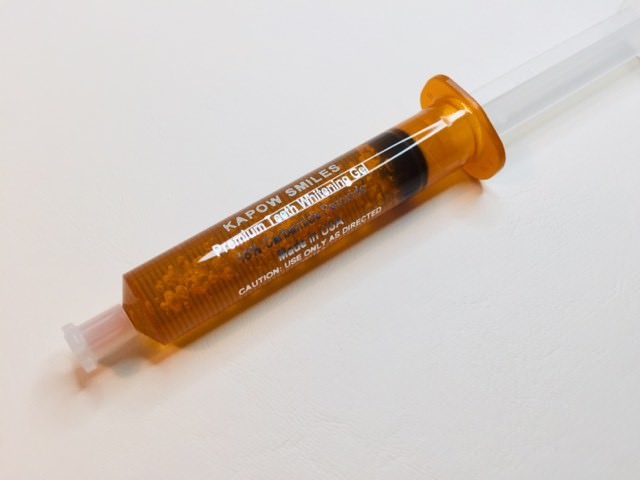
The Premium Whitening Gel
Not sure if this was a running deal with Kapow Smiles at the time I purchased the kit but it’s always nice to be surprised.
Design and Features
I believe, looking at a range of whitening kits on the Australian market to date, the features of the Kapow Smiles whitening kit are pretty standard.
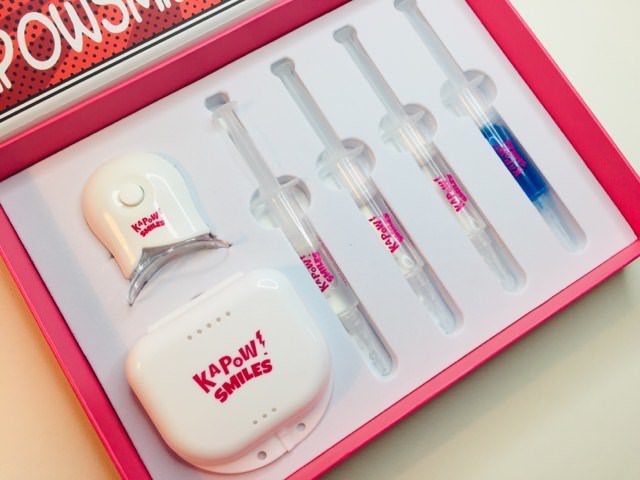
The foam cushion cutouts help secure the kit nicely
The LED whitening light seems to be used crossed the board when whitening your teeth.
Kapow’s LED Light feels to be made well and I didn’t have any issues with operating it.
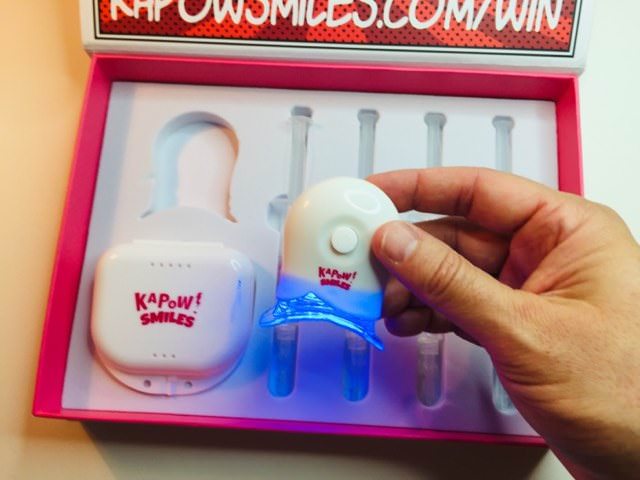
Checking out the LED light by Kapow
Syringes are carefully packed and sealed away nicely. The cushion cutouts help protect all the items in the kit.
The internal foam is of a high density and does a great job at securing each item in its designated position.
The gel inside the syringe comes out smoothly and is able to be applied consistently.
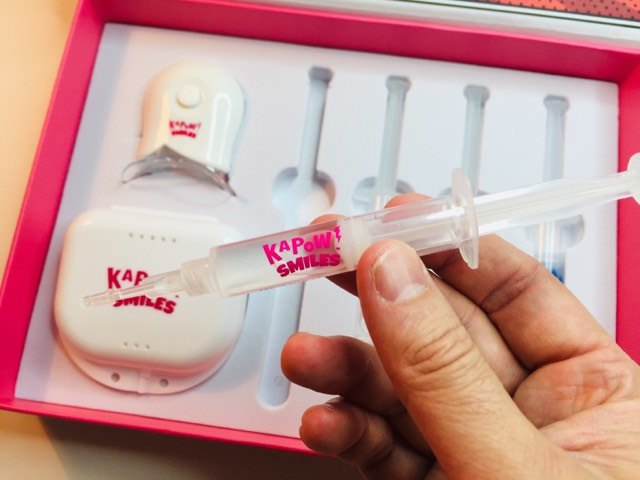
A quick look at the whitening gel syringe
In order to help the process with whitening your teeth, Kapow offers 2 sets of mouth trays.
They are relatively easy to mould and the instructions are clear and simple. More on that shortly.
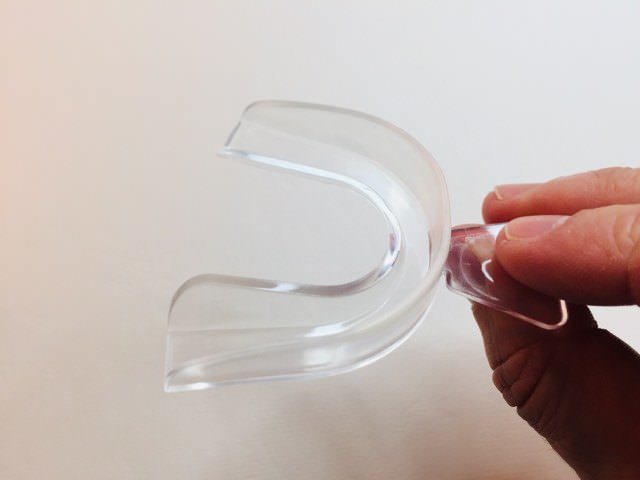
The mouth tray is simple and easy to use
As far as the design of the kit is concerned, I think it’s vivid and eye-catching. It’s simply laid out and easy to use and understand.
The individual items inside the kit are well made and make using the Kapow kit effortless.
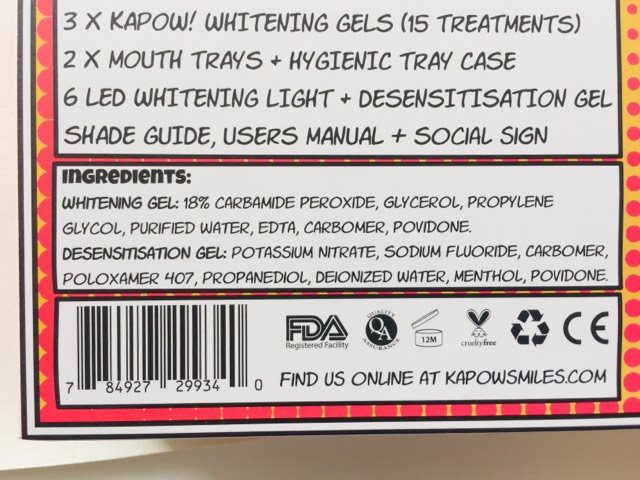
- 18% Carbamide Peroxide
- Glycerol
- Propylene Glycol
- Purified Water
- Edta
- Carbomer
- Povidone
The active ingredient that makes your teeth whiter is the 18% carbamide peroxide which removes surface stains, as confirmed by Kapow Smiles.

18 % Carbamide Peroxide is clearly written on the syringe
The Kapow kit mentions it can be used for a range of applications to remove surface stains such as:
- Food
- Drink
- Tobacco
- Genetics
- Tetracycline
- Ageing
Dentists refer to surface stains as extrinsic stains.
If you have intrinsic stains (deeper and internal stains) and would like to whiten your teeth it is best to go see your dentist. They can provide you with a professional opinion and treatment options available.
In the Desensitisation Gel, there are 8 ingredients involved:
- Potassium Nitrate
- Sodium Fluoride
- Carbomer
- Poloxamer 407
- Propanediol
- Deionized Water
- Menthol
- Povidone
Directions for Use
Let me break down how the process works and the directions they provide which come in a very colourful user manual.
Full of information, the user manual has a lot of important points but done in an easy and fun way.
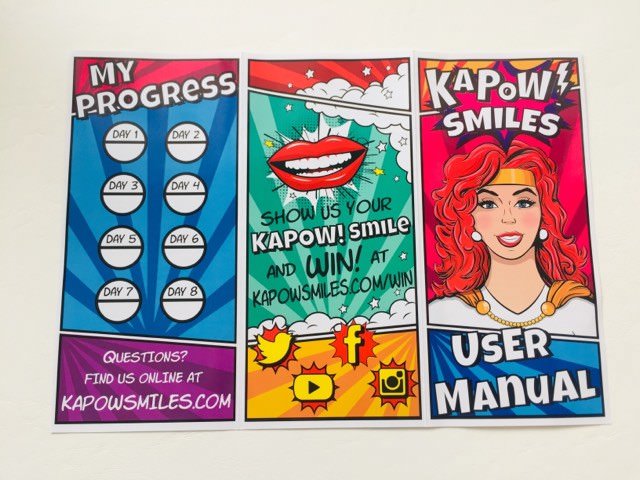
Kapow’s user manual
The user manual outlines 6 points that users need to be aware of:
- Do not swallow the liquid
- Avoid contact with eyes and clothing
- 16 years of age and younger – No permitted
- Don’t use if you are pregnant or breastfeeding
- Don’t use if you have health and dental problems, including braces and bad gums, ulcers and exposure routes
In relation to sensitivity, Kapow Smiles recommends stopping if you experience a lot of sensitivity while using their product.
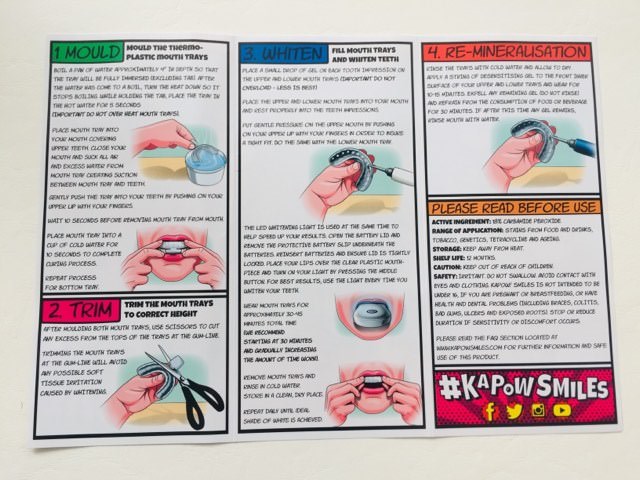
All user manual instructions
1st Part – Mould
The Kapow kit comes with 2 sets of mouth trays which are similar to a sports mouth guard, but a little less structured.
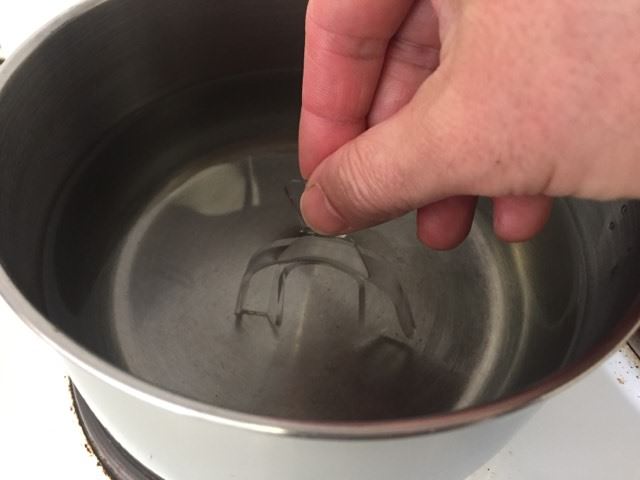
The first step in this process is to boil a pot of water, possibly four inches or 10cms in-depth. I just used my fingers to guide this measurement when filling the pot so that the mouth tray sits submerged in that water when the time is right.
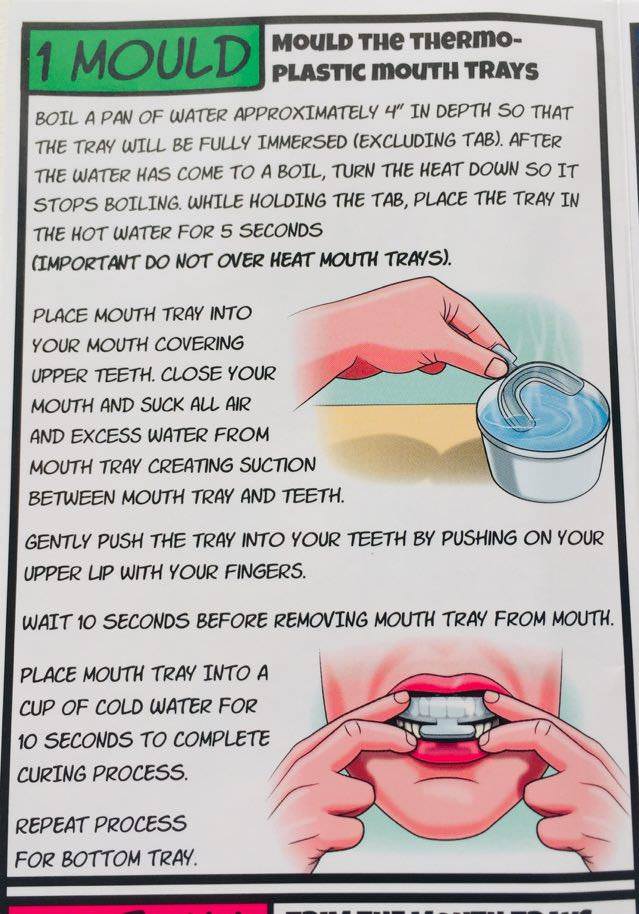
1st step – Mould the tray
Once the water has boiled, turn the heat down so it stops boiling.
Holding the tab at the front of the tray, submerge the mouth tray into the hot water and leave it for five seconds. I decided on 6 seconds which worked out well.
Now, it’s important not to overheat your mouth tray (my bad).
Following the 1st step and mould the tray
I placed the tray into my mouth, covering the upper teeth and closed my mouth.
Suck all the air and excess water from the mouth tray as you bite gently into it.
This basically creates suction between your mouth tray and your teeth, making a nice snug fit and improving the moulding process.
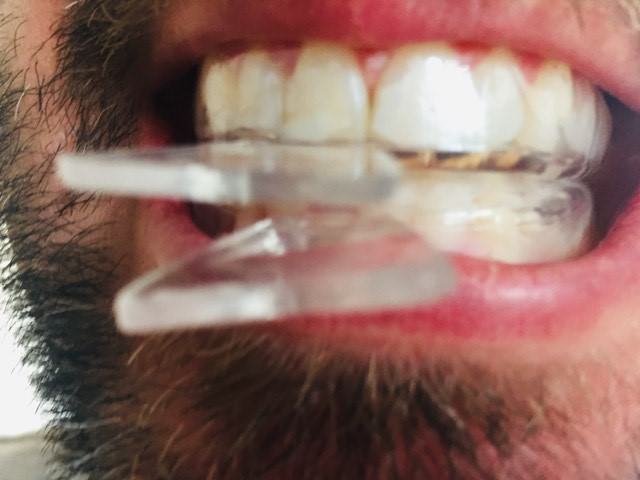
Following the moulding process to the T!
I also gently push the tray with my fingers so it properly formed around my teeth, creating a better mould overall.
Wait 10 seconds before removing the tray from your mouth that just gives enough time so you can get a well-shaped mould of your teeth.
The tray will set when you pop it in a cup of water for 10 seconds.
When you have completed the top tray, repeat the process for the bottom teeth.
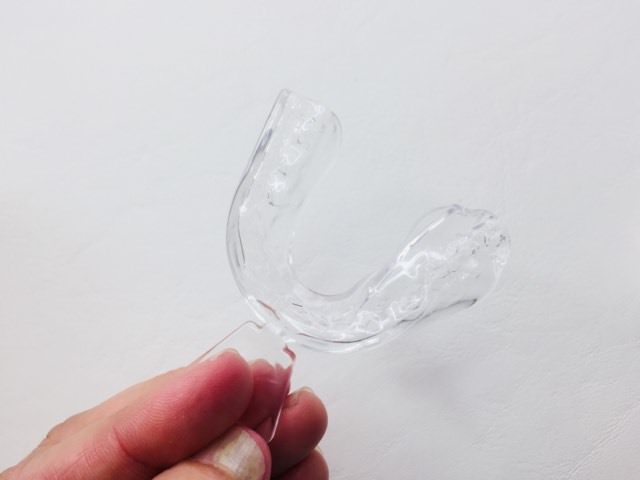
My front teeth moulded tray
Part 2 – Trim
Once you’ve completed the tray moulds, there’s just a couple of things you need to do.
First, trim the holding tabs using a pair of scissors, making sure it’s flush and smooth.
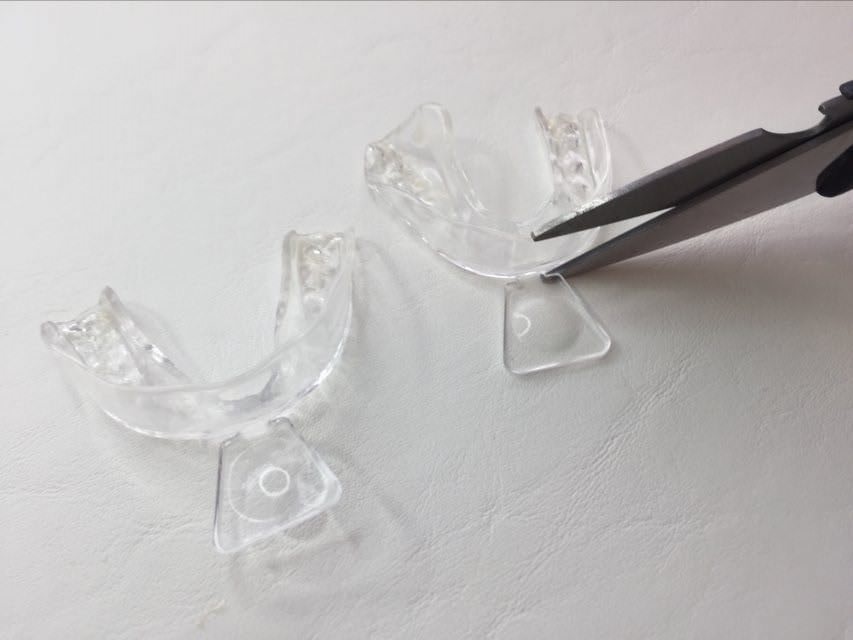
Use some scissors to trim the holding tabs
Then trim any excess material from the tops of the trays at the gumline.
For me, I only had to trim the bottom tray a little to make it mould around my teeth. The tops fit perfectly!
By removing this excess you will hopefully reduce any possible soft tissue irritation caused by whitening.
Part 3 – The Whitening Process
To start the whitening process, you have to fill the mouth trays with a small drop of gel on each tooth impression for both the upper and lower trays.
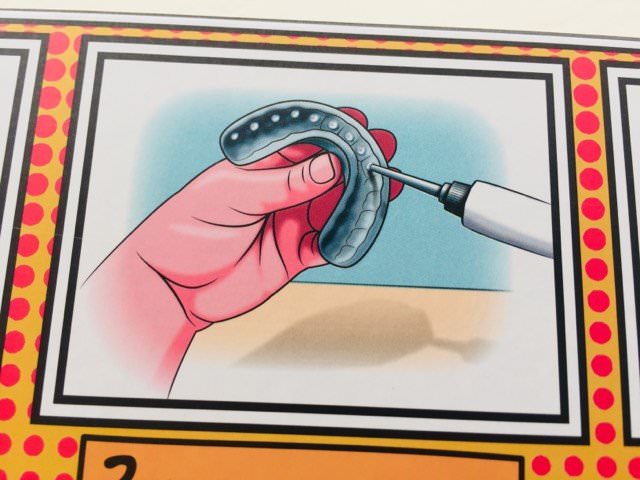
Kapow Smiles illustration on how to apply the whitening gel
It’s very important and Kapow Smiles stress this, not to go overboard with adding gel to the trays, less is best in their opinion. And I have to agree with this on previous experiences with teeth whitening kits.
Make sure it’s a nice small drop inside each impression on the tray. And it should be pretty easy to identify those areas if you’ve done the moulding process correctly.
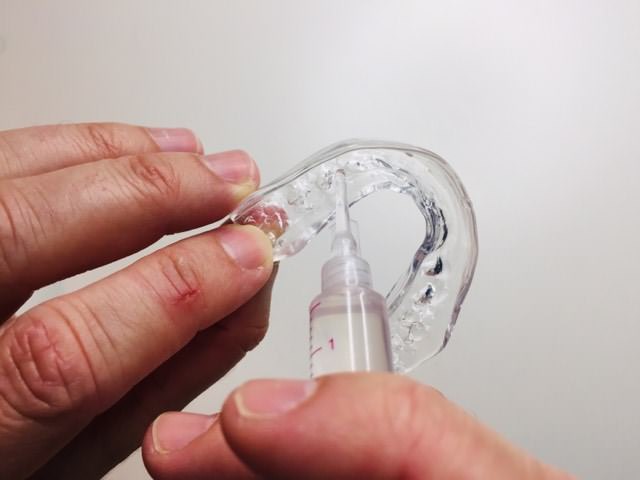
Applying the whitening gel to the impressions of my teeth
Gently fit the trays with the gel into your mouth and apply a little pressure on your upper mouth. Use your upper lid and fingers to aid in this.
That basically ensures a perfect tight fit, and you do the same process with the lower mouth tray.
LED Light Instructions
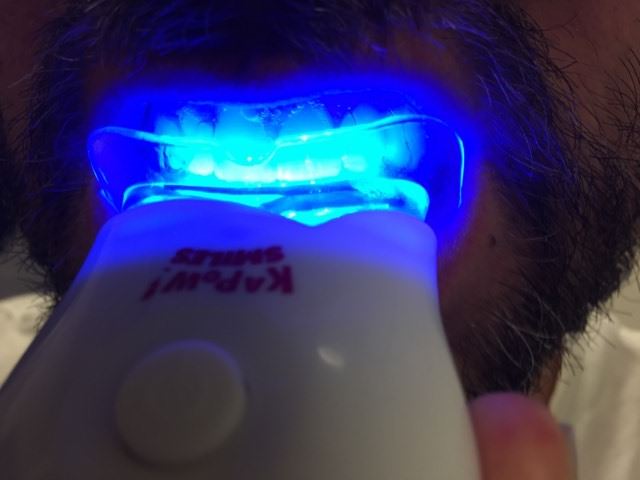
Kapow Smiles confirms that their LED light is the most updated technology and says it helps speed up the results you’ll get.
The LED light activates the whitening agent within the formula.
Turning on the LED kit light… pretty bright indeed!
But before you start using the LED whitening light, you have to just open up the battery lid to remove the protective battery slip underneath the batteries.
Re-inserting the batteries will restore the connection and you are good to go.
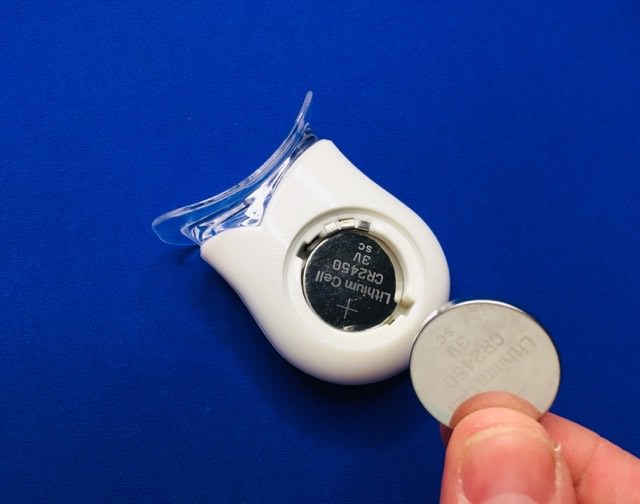
The LED light takes 2 Lithium Cell CR2450 3V sc batteries
You might realise when you first tried it and you’re like, “Why isn’t this working?” It’s just because the protector is inside stopping it going flat while it’s in storage.
Make sure you use that LED light every time you whiten your teeth.
LED doing its thing
The instructions state you should wear your mouth trays for approximately 30 to 45 minutes total time.
In the beginning, start off with 30 minutes and see how you go, and then you can gradually increase from there and yeah, just take it step by step and see how you feel.
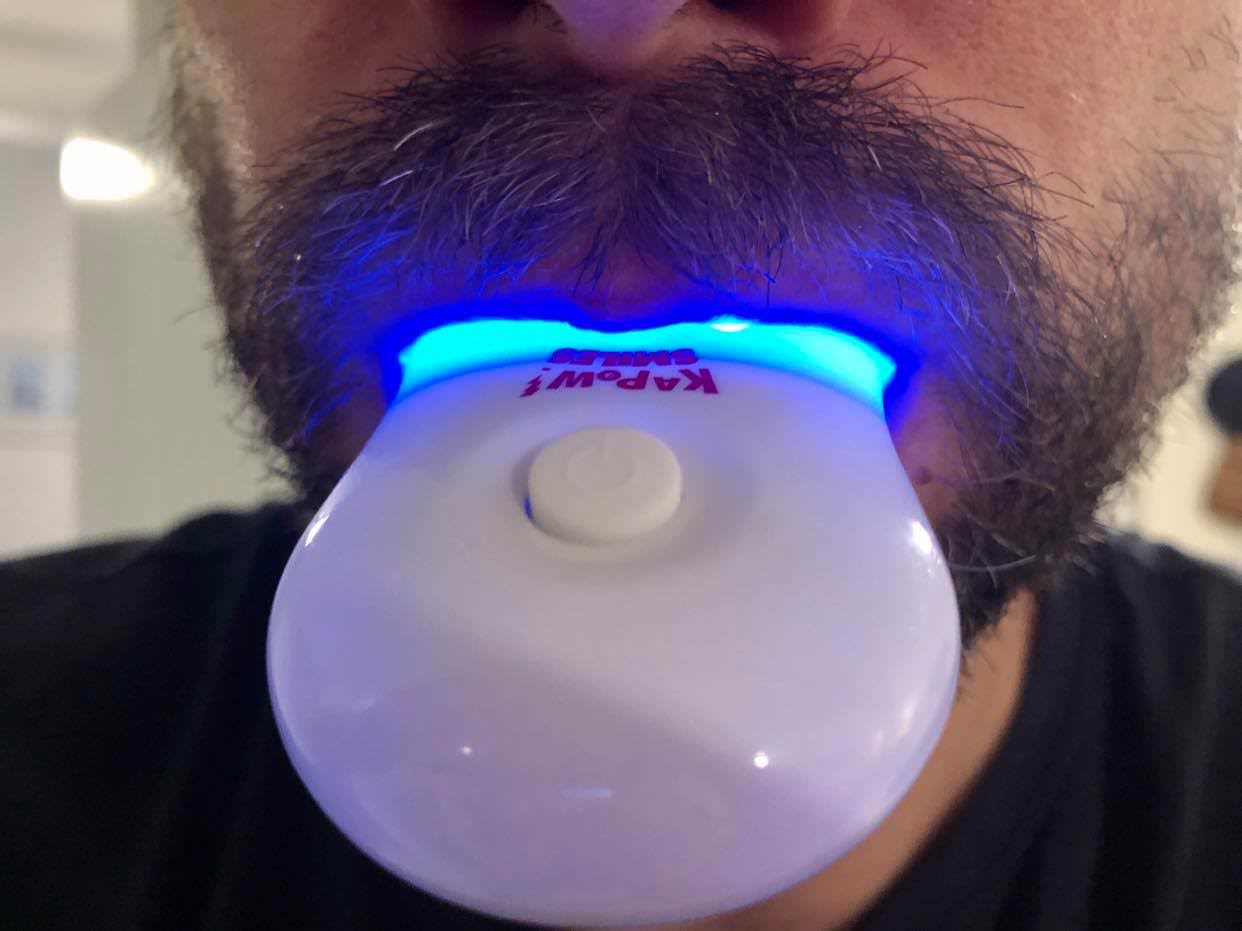
Trying to hold the tray and the LED light in my mouth.. a little bit of a mouthful
Remove the mouth trays once finished and run it under a cold tap or in a cup of water. The important point is to make sure it’s clean.
The final step is to dry the trays properly. Drip drying can be used before storing back in the mouth case provided.
Repeat the whitening process daily 🙂
Part 4 – Remineralisation
You can opt to use the re-mineralization/desensitising formula after your daily whitening treatment.

Checking on the Re-mineralisation gel in the Kapow kit
Apply the re-mineralisation/desensitising gel in the same way as the whitening formula to the trays (less the LED light). Use it for 10 to 15 minutes.
Make sure to expel any remaining gel, do not rinse this off and refrain from the consumption of food or beverage for 30 minutes.
My 8 Day Test
The Kapow Smiles user manual has a section that says “My Progress” with 8 days to use the kit.
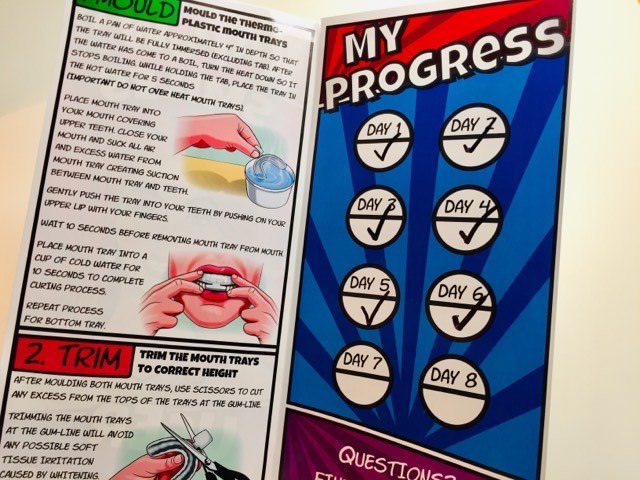
Marking off my progress.. day 6 and going strong
Having something to mark off or tick was helpful and kept me on track with my daily whitening routine.
I recorded my thoughts each day and this is what happened…


Usage Timeline
-
Initial UsageCondition: Excellent
Day 1 was exciting as I went through the kit and explored the items inside.
Preparing the moulds took some time but it was fairly easy and didn't have any problems with it.
Applying the gel was smooth and relatively easy. I did think why are they telling me to put the whitening gel in the bottom impressions of my teeth? Won't this only whiten the base of each tooth? We will see!
My first 30 minutes was okay, to be honest, it was an adjustment and patience was required.
-
Day 2Condition: Great
I applied a small amount of whitening gel as recommend and haven't had any discolouration on my gums.
Using my phone to time how long I used it for. 32 minutes this time.
No sensitivity noted but I can feel the gel activating, there's definitely I taste and feeling associated with the whitening process.
-
Day 3Condition: Great
Checking the kit I notice the little caps stay on the syringes well.
The LED light is better left upside down so it doesn't turn on accidentally.
Applied a little more gel this time and there was only a marginal difference in sensitivity. My gums didn't show signs of discolouration.
Feeling like my teeth are clearing up and there's a polished look about them.
I'm sticking to the 30-minute range, happy with that timeframe.
I did forget I couldn't eat or drink for 30 minutes after this session. Turns it into a 1 hour minmum treatment. This could be one of the disadvantages with this kit.
-
Day 4Condition: Great
I'm enjoying getting the kit out and preparing the trays with the whitening gel. The box provides a good base when sitting on the couch.
A tried applying the whitening gel to the front corner of the mouth trays, almost the upper section of the tray. I believe it should help improve the contact between the tooth and whitening gel... more logical anyways.
Having the LED and the mouth trays in my mouth at the same time is a little annoying and you feel sometimes it's a little too much.
-
Day 5Condition: Great
Teeth are looking good. They seem much brighter when I smile.
I find when using the kit I try to have something to do, either Youtube, Netflix or reading are my go-to options. The time really goes fast and you forget you have trays and a LED light in your mouth.
The only thing I find really annoying is the amount of salvia I get after using the kit. It's quite messy and you must be over the bathroom sink when taking the LED light and trays out.
This is my experience, it could be different, person to person though.
-
Day 6Condition: Great
Tried a little more whitening gel this time and seemed to be okay. It wasn't a huge amount more just enough I feel.
I recommend making sure you brush and floss your teeth, just makes the whole experience better.
33 minutes and it felt like a long time tonight. Not sure why I was watching some Netflix.
The evening seems to be the best time for me to use this kit. All food and drink consumption completed (for the most part) and you can whiten your teeth without feeling it's getting in the way of something.
Re-mineralisation gel was used for the first time this evening. I didn't really need it but wanted to find out what it tasted like and felt. It was okay and 10mins went fast!
After 6 days my teeth are visibly whiter I feel. there's at least maybe 2 shades whiter.
-
Day 7Condition: Great
I applied a little more gel to see if it would create any sensitivity. Only a little but it was mild overall.
Quite enjoy using the kit, I like using the kit box as my station when I apply the gel into the trays.
Didn't feel like using the re-mineralisation gel tonight, didn't think it did a whole lot last night.
-
Day 8 - Final ApplicationCondition: Great
I used the kit for 30 mins this afternoon as a worked from my computer. Time went fast and before I knew it time was up.
No sensitivity noticed, I did use more whitening gel than normal and it's been okay.
I haven't experienced any gum discolouration that occurs sometimes when you have excess whitening gel flow over the mouth trays. This is great to note.
Teeth are whiter and my partner thinks so too. She believes my top teeth are whiter than the bottoms.
Overall I'd say my teeth are at least 2-3 shades whiter going off the teeth whitening guide which came with the kit.
Price and Value
Kapow Smiles whitening kit does vary in price and depends on a few things.
The first is whether you get a discount and the second is whether there are any sales on offer.
I purchased this kit for $59.95 including free express shipping direct from Kapow Smiles. I found a discount and at this price was representing great value.
Express shipping was a nice touch and put a smile on my face straight away because I got what I wanted, fast!
There are only a few teeth whitening companies offering this express postal service for free (at the time of writing this review post).
Realistically, the price range is somewhere between $59.95 to $99.95 for the standard Kapow kit, delivered.
Even for $80, it offers good value for money.
Overall
A Kapow Smiles Teeth whitening kit stands out from the rest of the other kits available.
The colours and creative flares used to capture a different approach to whitening your teeth worked nicely I thought
The branding is bold and that won’t appeal to everyone but the whitening process was easy to understand and use.
The product is good value and is well made. I found it dependable which was a surprise to me.
I never had any issues with the kit itself and would recommend it for someone looking for a little fun while they whiten their teeth.
The whitening process does take time to work, so be prepared to invest at least 1 hour per day to complete the Kapow sessions.
The system did create a lot of saliva and it was quite overwhelming in the beginning. However, as I used it and slowly got used to the process it became something I just expected. To be fair, It could be just my personal experience and I’m willing to accept that.
My teeth are whiter, it’s true. I would say at least 2-3 shades whiter which is wonderful!
My experience has been positive and successful and I believe Kapow Smiles should be considered when searching for a teeth whitening kit.
Disclaimer: I purchased the kapow Smiles Whitening Kit and wasn’t paid to review the product.
Have you tried a whitening kit that works well?
By Anthony Cade
Created at May 24, 2020, Updated at January 25, 2025